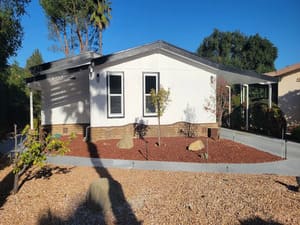
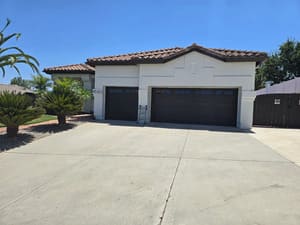
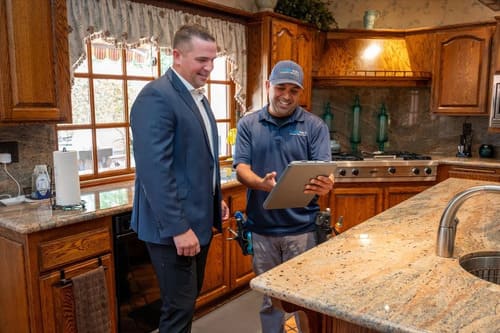
Sewer Line Camera Inspection Cost
- Anthony Flores
- 22 hours ago
- 11 min read

A $350 inspection could save you from a $15,000 surprise. When you're dealing with persistent drain issues or buying a new home, understanding sewer line camera inspection costs helps you make important decisions without breaking the bank. This article covers everything you should know about pricing, what affects costs, and how to get the best value for your investment.
How Much Does Sewer Line Camera Inspection Cost?
Most homeowners pay between $250-$500Â for a professional sewer camera inspection, with the national average around $350. At Turn Key Property Inspectors, you can expect to pay around $295 for a standard residential sewer line inspection. However, this price varies significantly based on several factors we'll explore in detail.
National Average Pricing Breakdown
Basic Residential Inspection: $200-$350
Single-family homes up to 2,500 sq ft
Standard sewer line length (50-120 feet)
Basic video recording and verbal report
Typical duration: 45-90 minutes
Complex Properties: $400-$600
Larger homes with longer sewer runs
Multiple connection points or branches
Detailed written reports with mapping
Properties over 2,500 sq ft
Emergency or After-Hours Service: $500-$800
Weekend or evening calls
Urgent backup situations
Same-day service requests
Holiday or emergency surcharges
Commercial Properties: $600-$1,200+
Multi-unit buildings
Complex commercial systems
Multiple sewer lines
Detailed documentation requirements
Regional Price Variations
Geographic location significantly impacts pricing. Urban areas with higher labor costs typically charge 20-40% more than rural locations:
High-Cost Areas (Major metropolitan cities): $400-$600 average Medium-Cost Areas (Suburban/mid-size cities): $300-$450 average Lower-Cost Areas (Rural/small towns): $200-$350 average
7 Factors That Determine Your Sewer Camera Inspection Cost
Understanding what affects pricing helps you budget accurately and avoid surprise charges.
Property Size and Sewer Line Length
Larger properties typically have longer sewer runs from the house to the street connection. A typical single-family home has 50-100 feet of sewer line, while larger properties may have 150+ feet. Each additional 50 feet of line generally adds $50-$100 to the inspection cost due to increased time and equipment wear.
Typical Line Lengths:
Small homes (under 1,500 sq ft): 40-80 feet
Standard homes (1,500-2,500 sq ft): 60-120 feet
Large homes (2,500+ sq ft): 100-200+ feet
Properties on large lots: 200+ feet
Accessibility of Cleanouts
The main sewer cleanout provides access to your sewer line. Easy access keeps costs down, while difficult access increases them:

Standard Access (No Extra Cost):
Cleanout clearly visible and accessible
Located outside near foundation
No digging or clearing required
Limited Access (+$50-$150):
Cleanout buried under landscaping
Requires minor excavation
Multiple cleanouts need to be checked
Difficult Access (+$100-$300):
No existing cleanout (rare in newer homes)
Cleanout removal/installation needed
Significant landscaping obstacles
Geographic Location and Local Labor Costs
Regional economics directly impact service pricing:
California, New York, Massachusetts:Â Premium pricing due to high labor costs, licensing requirements, and cost of living
Texas, Florida, Arizona:Â Moderate pricing with competitive markets and reasonable labor costs
Midwest, Southeast:Â Generally lower pricing due to lower overhead costs and regional competition
Rural Areas:Â Often lower base prices but potentially higher travel charges for service calls
Equipment Quality and Technology Used
Professional-grade equipment costs more but provides superior results:

Basic Equipment ($200-$300 range):
Standard resolution cameras
Basic recording capabilities
Limited distance capability
Minimal reporting features
Professional Equipment ($300-$500 range):
High-definition color cameras
Advanced recording with location tracking
Self-leveling camera heads
Comprehensive reporting software
Brands like Milwaukee, Ridgid, or CUES
Commercial-Grade Equipment ($500+ range):
4K resolution cameras
Detailed mapping and measurement
Advanced lighting systems
Professional inspection software
Comprehensive documentation
Inspection Report Detail Level
The depth of reporting affects pricing:
Basic Report (Lower cost):
Video recording provided
Verbal explanation of findings
Simple problem identification
Standard Report (Mid-range):
Video recording with timestamps
Written summary of findings
Photo documentation of problems
Basic recommendations
Comprehensive Report (Higher cost):
Detailed written report
Problem location mapping
Repair cost estimates
Maintenance recommendations
Follow-up consultation included
Time of Service (Regular vs. Emergency)
When you schedule affects what you pay:
Regular Business Hours:Â Standard pricing applies Evenings/Weekends:Â 25-50% surcharge typical Emergency Service:Â 50-100% surcharge possible Holiday Service:Â Premium rates (2x standard)
Additional Services Bundled
Many companies offer package deals that reduce per-service costs:
Home Inspection Bundle:Â Often saves $50-$100 when combined Multiple Inspections:Â Discounts for multiple properties Annual Maintenance Plans:Â Reduced rates for repeat customers Real Estate Agent Programs:Â Special pricing for agent referrals
What's Included in a Professional Sewer Camera Inspection
Understanding what you get for your money helps evaluate different service providers and pricing structures.
Pre-Inspection Assessment
Before inserting the camera, professional inspectors conduct a thorough assessment:
Property evaluation to understand sewer system layout
Cleanout location and accessibility check
Initial discussion of any known problems or concerns
Equipment setup and safety preparation
Clear explanation of the inspection process
Camera Equipment and Technology
Professional sewer camera systems include:
High-Definition Camera Head:
Waterproof construction rated for sewer environments
LED lighting for clear visibility in dark pipes
Self-leveling technology to maintain proper orientation
Durable construction to navigate bends and obstacles
Flexible Cable System:
Push-rod cable typically 100-200 feet long
Footage counter to track camera location
Fiberglass construction for durability
Smooth operation through pipe bends
Recording and Display Equipment:
High-resolution color monitor for real-time viewing
Digital recording capabilities for documentation
Audio recording for inspector commentary
Screenshot capability for report documentation
Real-Time Video Recording
During the inspection, you receive:
Complete video documentation of the entire accessible sewer line
Real-time viewing so you can see problems as they're discovered
Professional commentary explaining what you're seeing
Problem identification with detailed explanations
Location tracking to pinpoint where issues exist
Written Report and Recommendations
Comprehensive documentation includes:
Problem Documentation:

Detailed description of all issues found
Photo evidence of significant problems
Location information for each concern
Severity assessment (minor, moderate, severe)
Recommendations:
Immediate action items for urgent problems
Preventive maintenance suggestions
Repair options and typical costs
Timeline recommendations for addressing issues
Technical Information:
Pipe material identification
Overall condition assessment
Flow and grade evaluation
Connection point analysis
Follow-Up Consultation
Professional service includes:
On-site explanation of all findings
Question and answer session about discovered issues
Referral to qualified contractors if repairs needed
Follow-up availability for additional questions
Re-inspection scheduling if repairs are completed
Step-by-Step: What Happens During Your Inspection
Understanding the process helps you prepare and know what to expect on inspection day.
Locating and Accessing Sewer Cleanouts

Step 1: Cleanout Identification The inspector begins by locating your main sewer cleanout, typically found:
Outside your home near the foundation
In the basement or crawl space
Sometimes in the garage
Occasionally in utility rooms
Step 2: Access Preparation
Remove cleanout cap (may require special tools)
Inspect cleanout condition and accessibility
Clear any debris from the opening
Set up equipment near access point
Step 3: Safety Setup
Ensure proper ventilation if working in enclosed spaces
Set up equipment to prevent contamination
Prepare protective equipment as needed
Establish clear work area around cleanout
Camera Insertion and Navigation

Initial Insertion:
Camera head is carefully inserted into the cleanout
Inspector begins recording immediately
Initial assessment of pipe condition at entry point
Verification of proper camera operation
Navigation Process:
Camera is slowly advanced through the sewer line
Inspector monitors footage counter for location tracking
Careful navigation around bends and joints
Adjustment of camera speed based on conditions found
Documentation During Travel:
Continuous recording of entire line inspection
Verbal commentary describing conditions
Screenshot capture of significant findings
Note-taking for report preparation
Problem Identification and Documentation
Common Issues Inspectors Look For:

Tree Root Intrusion:
Roots entering through pipe joints
Severity assessment from minor to complete blockage
Location documentation for targeted treatment
Growth pattern analysis for future prevention
Pipe Damage:
Cracks in pipe walls or joints
Collapsed or crushed sections
Corrosion in metal pipes
Missing pipe sections or gaps
Flow Problems:
Pipe bellies (low spots where waste collects)
Improper grade causing slow drainage
Offset joints creating flow restrictions
Backfall sections that drain backward
Blockages and Buildup:
Grease accumulation reducing pipe diameter
Debris blockages from foreign objects
Scale buildup in older pipes
Root masses creating partial or complete blocks
Results Explanation and Next Steps
Immediate On-Site Review:
Inspector explains findings in understandable terms
Shows video footage of significant problems
Discusses severity and urgency of issues
Answers questions about discovered problems
Report Delivery:
Digital copy provided same day (typically via email)
Physical copy available if requested
Video files accessible through secure link
Photos included for significant findings
Recommendation Discussion:
Prioritization of problems requiring attention
Repair options and typical cost ranges
Preventive maintenance suggestions
Timeline for addressing various issues
Common Problems Found and Associated Costs
Understanding typical problems helps you budget for potential repairs and understand the value of inspection.
Tree Root Intrusion
Description:Â Tree roots naturally seek water sources and can infiltrate sewer pipes through joints, cracks, or connection points. This is the most common problem found during sewer camera inspections.
Severity Levels:
Minor:Â Small root intrusions causing slight flow restriction
Moderate:Â Noticeable root growth reducing pipe capacity
Severe:Â Major root masses causing frequent backups
Typical Repair Costs:
Root cutting/cleaning:Â $300-$800
Chemical root treatment:Â $200-$500
Pipe repair at entry points:Â $1,500-$5,000
Full line replacement:Â $8,000-$25,000
Prevention:Â Regular maintenance cleaning, root barriers, careful landscaping planning
Pipe Cracks and Breaks
Description:Â Pipes develop cracks due to age, ground movement, freezing, or external pressure. Clay and cast iron pipes are particularly susceptible.
Common Causes:
Ground settling or shifting
Tree root pressure
Freeze-thaw cycles
Heavy vehicle traffic above
Normal aging of materials
Repair Options:
Pipe lining:Â $150-$300 per foot
Spot repairs:Â $1,000-$4,000 per location
Section replacement:Â $3,000-$8,000
Full line replacement:Â $10,000-$25,000
Blockages and Buildup
Types of Blockages:
Grease accumulation:Â Reduces pipe diameter over time
Foreign objects:Â Items that shouldn't be flushed
Scale buildup:Â Mineral deposits in older pipes
Debris collection:Â Accumulated waste materials
Cleaning Costs:
Basic drain cleaning:Â $150-$400
Hydro jetting:Â $400-$1,000
Mechanical cleaning:Â $300-$800
Chemical treatment:Â $200-$600
Pipe Bellies and Offset Joints
Description:Â Sections of pipe that sag (bellies) or where joints have separated (offsets) create areas where waste collects and flow is restricted.
Common Causes:
Ground settling
Poor initial installation
Soil erosion under pipes
Heavy loads above ground
Repair Requirements:
Minor adjustments:Â $500-$2,000
Section replacement:Â $2,000-$6,000
Extensive repairs:Â $5,000-$15,000
Prevention:Â Proper backfill and support during installation
When Is Sewer Camera Inspection Worth the Cost?
Understanding when to invest in inspection helps you make cost-effective decisions.
Before Home Purchase
Why It's Critical:Â Sewer line problems are expensive and often not covered by home warranties or insurance. A $350 inspection can reveal issues that cost $10,000-$25,000 to repair.
Especially Important For:
Homes over 20 years old
Properties with mature trees nearby
Houses in areas with known sewer problems
Homes that have experienced previous plumbing issues
Negotiation Power:Â Discovery of sewer problems gives you leverage to:
Negotiate purchase price reduction
Request seller repairs before closing
Plan and budget for necessary work
Walk away from deals with major issues
Recurring Drain Issues
Warning Signs:
Frequent drain backups
Slow-draining fixtures
Gurgling sounds from drains
Sewage odors in yard or basement
Wet spots in yard near sewer line
Diagnostic Value:Â Rather than repeated drain cleaning attempts, camera inspection identifies root causes and guides effective treatment.
Cost Comparison:
Multiple drain cleaning calls: $150-$400 each
Single diagnostic inspection: $295-$500
Targeted repair based on findings: Varies by problem
Blind repair attempts: Often expensive and ineffective
Before Major Landscaping
Planning Benefits:
Locate sewer line before digging
Plan tree placement to avoid future root problems
Identify vulnerable areas needing protection
Document existing condition before work begins
Protection Investment:
Prevent accidental damage during construction
Plan proper tree species and placement
Install root barriers if needed
Establish baseline for future reference
Preventive Maintenance Schedule
Recommended Frequency:
New homes:Â Every 5-10 years
Homes 20-40 years old:Â Every 3-5 years
Homes over 40 years:Â Every 2-3 years
Properties with known issues:Â Annually
Long-term Value:Â Regular inspection helps catch problems early when repairs are less expensive and extensive.
How to Get the Best Value for Your Money
Making smart choices ensures you get comprehensive service at fair prices.
Questions to Ask Before Hiring
About the Service:
What equipment do you use? (Look for professional brands like Milwaukee, Ridgid)
How long does the inspection typically take?
What's included in your base price?
Do you provide video footage and written reports?
Can I watch the inspection in real-time?
About Qualifications:
Are your inspectors certified or licensed?
How many years of experience do you have?
Do you carry insurance and bonding?
Can you provide local references?
About Pricing:
Are there any additional fees or charges?
Do you offer package deals with other services?
What payment methods do you accept?
Is there a warranty on your inspection service?
About Follow-up:
Do you provide repair referrals if problems are found?
Can you explain findings in terms I'll understand?
Do you offer follow-up consultations?
Will you re-inspect after repairs if needed?
Red Flags to Avoid
Pricing Red Flags:
Prices significantly below market average (under $200)
Quotes over the phone without property assessment
High-pressure sales tactics
Demands for full payment upfront
No written pricing or service agreements
Service Red Flags:
No professional equipment visible
Unwillingness to show credentials or insurance
Can't provide local references
Pushes additional services aggressively
No clear explanation of what's included
Quality Red Flags:
No video recording provided
Rushed inspection (under 30 minutes)
Can't answer technical questions
No written report or documentation
Unwillingness to explain findings clearly
Bundle Deals and Package Savings

Home Inspection Packages:Â Many companies offer significant savings when combining sewer camera inspection with home inspection services. Typical savings range from $50-$100.
Multiple Property Discounts:Â Real estate investors or agents with multiple properties often receive volume pricing discounts.
Seasonal Promotions:Â Some companies offer reduced rates during slower periods or special promotions for new customers.
Referral Programs:Â Ask about discounts for referring other customers or repeat business incentives.
Frequently Asked Questions
Is sewer camera inspection tax deductible?
For homeowners, sewer camera inspection is generally not tax deductible unless it's part of a home improvement project that adds value to your property. However, rental property owners and real estate investors may be able to deduct inspection costs as business expenses. Consult with a tax professional for guidance specific to your situation.
How long does a sewer camera inspection take?
Most residential sewer camera inspections take 45-90 minutes, depending on the length of your sewer line and any problems discovered. Simple, clear lines can be inspected in 30-45 minutes, while complex systems or those with significant problems may require 90+ minutes for thorough documentation.
Can I watch the inspection live?
Yes, reputable inspection companies encourage customers to watch the live video feed. This transparency helps you understand exactly what's happening in your sewer line and builds confidence in the inspector's findings. You'll see problems as they're discovered and can ask questions in real-time.
What if problems are found during the inspection?
If problems are discovered, your inspector should explain the findings clearly, discuss severity and urgency, and provide recommendations for next steps. Most inspectors can refer you to qualified contractors for repairs but should not pressure you into immediate expensive services. You should receive a detailed report to share with contractors for accurate repair quotes.
Do I need to be present during the inspection?
While not required, it's highly recommended that you or your representative be present during the inspection. Being there allows you to:
Watch the live video feed
Ask questions about findings
Understand the severity of any problems
Get immediate explanation of results
Ensure thorough inspection of all accessible areas
How often should I have my sewer line inspected?
Inspection frequency depends on several factors:
New homes (under 10 years):Â Every 5-10 years or before major landscaping
Older homes (10-30 years):Â Every 3-5 years or when problems arise
Mature homes (30+ years):Â Every 2-3 years for preventive maintenance
Problem-prone properties:Â Annually or as recommended by your inspector
Will the inspection damage my landscaping?
Professional sewer camera inspection should not damage landscaping. Inspectors use existing cleanouts and don't require digging except in rare cases where cleanouts are buried or inaccessible. Any minor disturbance to locate cleanouts should be restored by the inspector.
What happens if the camera gets stuck?
Modern professional cameras are designed to navigate sewer lines safely, and experienced inspectors know how to avoid getting equipment stuck. In the rare event equipment becomes lodged, reputable companies carry insurance and have procedures to retrieve equipment without additional cost to you.
Can camera inspection find all sewer line problems?
Camera inspection is highly effective but has limitations:
Can detect:Â Blockages, root intrusion, cracks, pipe damage, bellies, offsets
Cannot detect:Â Problems behind pipe walls, leaks in joints without visible damage, or issues in areas the camera cannot reach
Requires clear access:Â Severely blocked lines may need cleaning before inspection
How soon will I get my report?
Most professional companies provide inspection reports the same day, either on-site immediately after inspection or via email within a few hours. The report should include:
Digital video file or link
Written summary of findings
Photos of significant problems
Recommendations for next steps
Inspector contact information for follow-up questions
Making the Investment Decision
A sewer camera inspection represents a small investment compared to potential repair costs. With sewer line replacement ranging from $15,000-$25,000 or more, a $295 inspection provides excellent insurance against costly surprises.
Whether you're buying a home, dealing with plumbing issues, or planning preventive maintenance, understanding your sewer line's condition helps you make informed decisions and avoid unexpected expenses.
For homeowners in the San Diego area, Turn Key Property Inspectors offers professional sewer camera inspections starting at $295, or $250 when bundled with home inspections. Our certified master inspectors use professional Milwaukee camera equipment and provide same-day digital reports with complete video documentation.
Ready to schedule your inspection? Contact Turn Key Property Inspectors today at 951-553-8562 or visit www.TurnKeyPropertyInspectors.com to book online. Protect your investment with professional sewer camera inspection services you can trust.